Showing posts with label Kids-Friendly. Show all posts

Wednesday, November 9, 2011

Oreo Pops

For the boy's 4th birthday in October, he's my FAVOURITE Libran, I decided to make oreo pops as 1 of the goodies for his goody bags. It's actually very simple, time is the most essential ingredient and a bit of trial and error is needed for the size of the oreo balls.

First up, crush the cookies including its cream centre till they become fine. Do ensure there are no big chunks cos' we need to shape the 'dough' into balls and we don't want to bite into huge chunks.


I used my braun handheld blender to blend the cookies. I placed the cookies in a tall measuring jar and blend the cookies uncovered. Since there was no cover, I had a bit of 'flying cookie' incident. I thought the jar was tall enough but apparently not enough to prevent any flying cookie. Lesson's therefore learnt, covered food processors are the best tools for blending the cookies.


In a separate bowl, beat softened cream cheese with an electric mixer. Then, add the blended oreo cookies into the cream cheese:

Knead them together till they become 'dough-like':


Then, Shape them into balls. The balls can't be too big, not the size of ping pong balls definitely. Perhaps a little larger than the size of marbles. Any bigger, the ball may slide down the lolly sticks or it may also crumble under the weight of the melt and sprinkles. Need some trial and error and agak2 here.


You can either refrigerate for 2 hours first or freeze for 10 to 15 minutes. I am kiasu, so I did both; I refrigerate for 2 hours and then move up to the freezer for 10 minutes. We need them to firm up so they don't crumble. But you should still be able to insert lolly sticks into the ball.

Remove from freezer, melt some chocolate, dip the edge of the lolly sticks into the chocolate melt and insert halfway through the oreo ball, making sure the ball does not crack:


When all's done, I chose to refrigerate again for 15 minutes.

After that, melt some chocolate or candy melts and then start dipping the balls and sprinkle! This screams only one thing: FUN FUN FUN!!


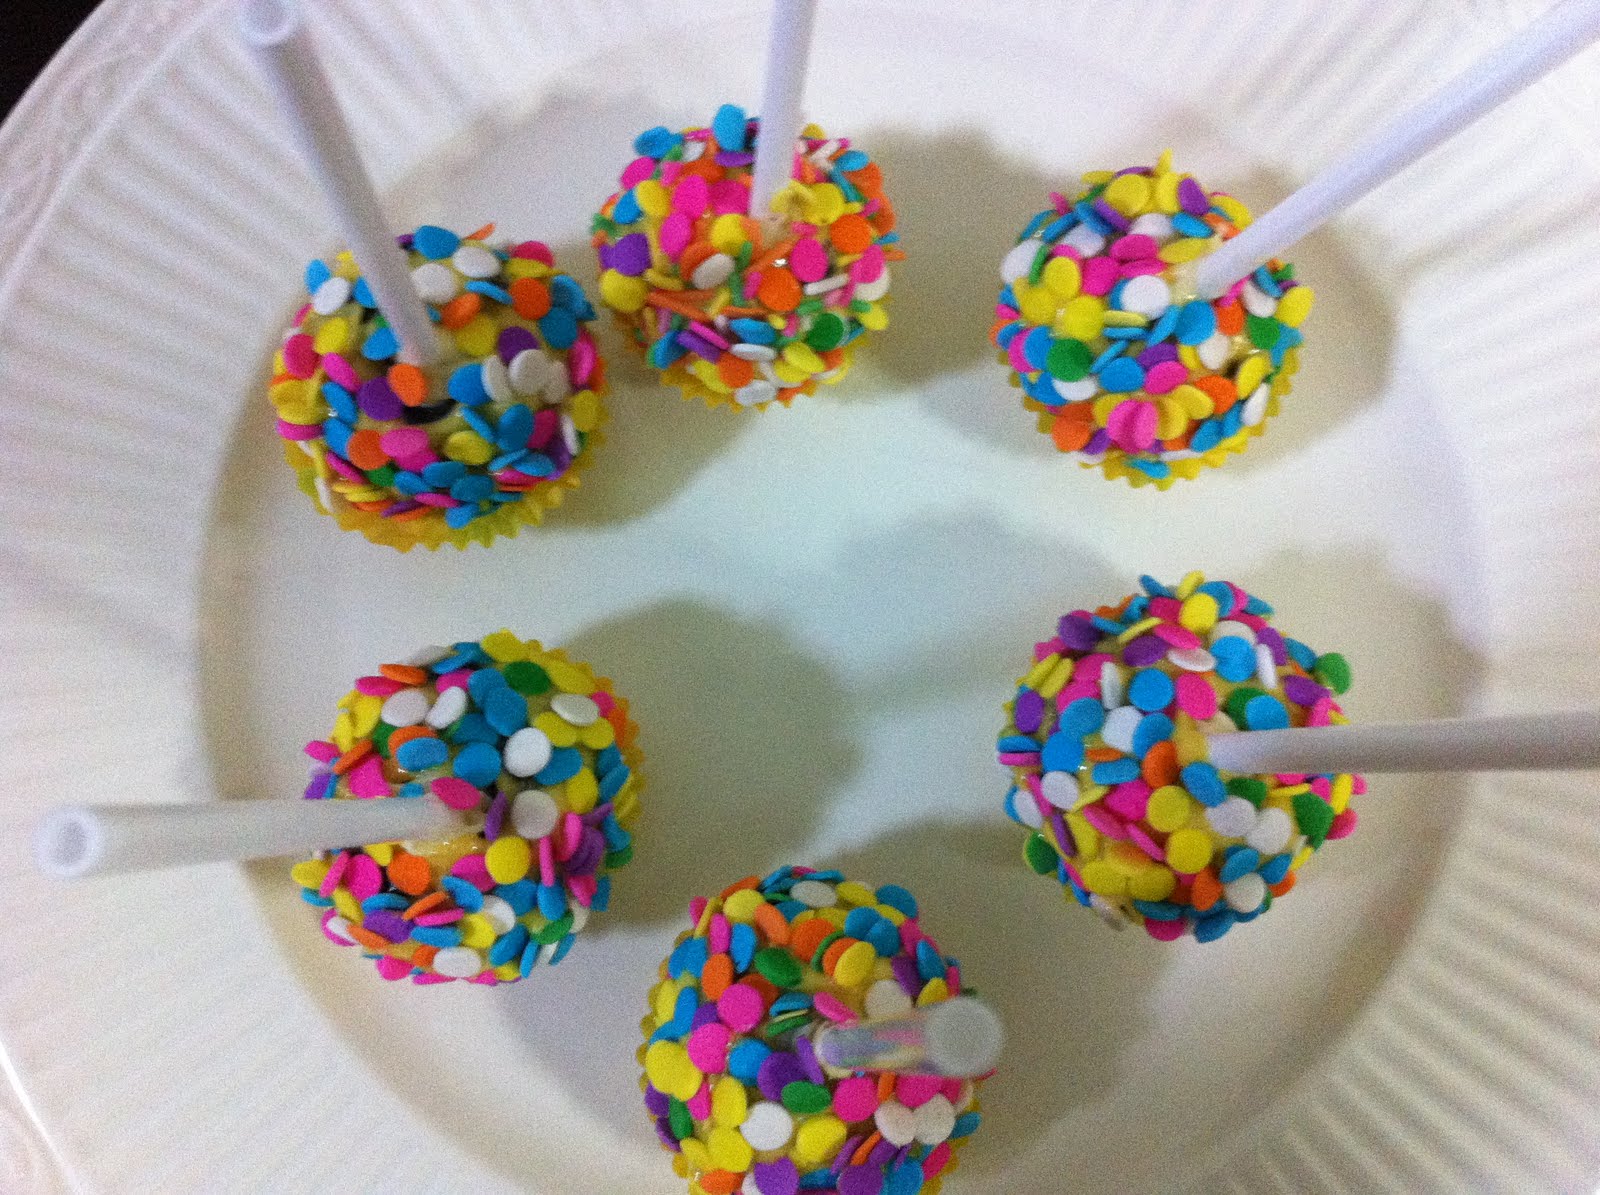


Finally, all packed and good to go for the boy's goody bags!


For ~30 oreo pops, I needed:

3 packs of original oreos
226g of cream cheese
White chocolate, which I tinted with oil-based yellow colouring from wilton.
Lolly sticks
Sprinkles
All were bought from your trusty phoon huat. :)

Note: Chocolate needs to be melted the double-boiler way, making sure no water droplets get into the melt.

Other than the oreo pops, I also made chocolate muffins for the boy's goody bags, transformers-themed. But I guess that warrants another (picture) entry altogether.

Anyway, here's a peek:


Autobots, transform and roll out.

Was the boy happy? VERY VERY Happy with both his oreo pops and his transformers muffins.

What more can a mother ask?
:)))))))))))
actually a lot more but No.1 is always to:
BE HAPPY!

Monday, August 8, 2011

Chicken Nuggets and Chicken Strips

It's been almost 3 months now since my last update. Oh-oh. This definitely calls for one.

We had our longest holiday recently, and since it's the longest hol we've ever had, it took us even longer to get back to the routine at home. Ok, I digress. For our travels, we'd usually stay in apartments, kitchen included, for us to experiment with home-away-from-home food.

I don't know why but I made these a lot more when I'm overseas, compared to when I'm home. For our recent travel, I made them too, chicken nuggets and chicken strips. The original recipe's from the domestic goddess herself but I tweaked them a bit and they are still a hit.

It was super easy but make sure you marinate it for at least 48 hours, the minimum.

The chicken breast would need to be marinated with buttermilk and ritz or cheese crackers. I did just that, marinated with buttermilk, crushed some cheese crackers and kept it in the fridge for 2 days.

After 2 days, I minced 1/2 of the portion, shaped them into tiny nuggets, coat them with breadcrumbs and crushed cheese crackers and fry them.

The other half were cut in strips, again coated with breadcrumbs and crushed cheese crackers and fried. It was yummy!

The way I made it was a little more cumbersome since I minced the chicken meat (1/2 of the portion) as much as possible before I shaped them. I also marinated the chicken together with the cheese crackers. The original recipe didn’t call for both.

The good thing about the recipe is it’s great for kids and mummies can also hide tiny broccoli florets or julienned carrots into the nuggets, if your kids are a little skittish of their greens.

If you want the original recipe from none other than the domestic goddess, check it out here:

http://www.foodnetwork.com/recipes/nigella-lawson/ritzy-chicken-nuggets-recipe/index.html

Here’s a direct copy and paste from the above site:

Ingredients

* 2 (each weighing approximately 8 ounces with the peg bone, less without) chicken breasts
* 1 cup buttermilk
* 1/2 cup oil (if you are frying the nuggets)
* 1 3/4 cups cracker crumbs (recommended: Ritz crackers)
* Serving suggestion: Capery Salad, recipe follows

Directions

Cut off the chicken peg bone if there is 1, and put the chicken breasts one at a time into a freezer bag so that it lies flat. Bash with a rolling pin until the chicken is quite thin, and then take it out and slice into about 6 to 8 slices. Repeat with the other chicken breast. This is easiest done with scissors.

Put the slices into a freezer bag with the buttermilk and leave in the refrigerator to marinade for up to 2 days.

When you are ready to cook them, heat the oil in a large frying pan, or preheat the oven to 425 degrees F.

Tip the cracker crumbs into a wide shallow bowl, and then shake off the excess buttermilk from the nuggets and dip them in the crumbs. Coat them well before lying gently in the hot oil, and cooking for about 2 minutes or so a side until they are golden brown. Transfer to a kitchen towel on a plate to blot the excess oil.

Alternatively, you can lay the crumb-coated chicken nuggets on a lined baking sheet and bake for 15 to 20 minutes. They can also be frozen once marinated and crumbed. If cooking from frozen, add 5 minutes to the oven cooking time.


Tuesday, May 3, 2011

ikan bilis

I used to grind ikan bilis for my baby when he was a baby. age-wise, he’s passed his babyhood, but my baby he'll always be forever and ever. and ever. ok, enough said. :P

not too long ago, he started being picky with his food. with me. come weekends.

And so, i made the ground anchovies again, to sprinkle on his rice when he refused any other side dishes. he is happy with eating plain rice on its own, so sprinkles of anchovies would give him that much needed protein, calcium, omega-3′s and they are also low in mercury:

http://www.associatedcontent.com/article/1815432/the_health_benefits_of_anchovies.html

first, dry roast the anchovies


then grind it with your food processor
tadaa!

Stored in airtight container and kept in the fridge.

Saturday, January 29, 2011

Cranberry Muffins


Another fuss-free bake is the trusty muffins.

If it means no mixer required and easy to clean-up, I am so in. But wait, let me clarify that we cannot, absolutely cannot use the mixer when making muffins. Overmixing will bruise the gluten and the muffins will come out tough. And we'll get very upset. Bcos' muffins, they are supposed to be fuss-free aren't they?

One of the questions abt muffins that came to my mind, and I'm sure others do too is what is the difference between muffins and cupcakes. After having baked both, muffins are usually more crumbly, less dense than cakes, although some muffin recipes do result in denser textures.

For me, I prefer my muffins to be crumbly, light, and moist, which is just the recipe I'm sharing with you here. I love having muffins at any time of the day too. If you ask me, I can eat my bakes for breakfast, lunch and dinner. If only the hubster and the boy can too. Hohoho! :P


Ingredients (All ingredients are at room temperature):
220g self-raising flour sifted
1/2 cup vegetable oil
3/4 cup fresh milk
3/4 cup castor sugar
1 egg, lightly beaten
1tsp vanilla essence
3/4 cup dried cranberries

i. Preheat oven to 180deg C
ii. Mix all dry ingredients together and make a well in the center.
iii. Mix all wet ingredients together and pour into the well. Add the cranberries. Mix until combined but do not overmix.
iv. Place in greased muffin tins or cups and bake for 20minutes or lightly browned.

It's important not to overmix so as not to bruise the gluten. It'll be good to use a flexible spatula and a large enough bowl, when mixing too.

I also realized that when baking muffins, when ingredients used are at room temperature, it makes for a better texture. The batter for this recipe is a little runny compared to other muffin recipes, and I must admit that my panic button was triggered a little. My worry was unfounded as they came out moist and crumbly, just what I like. The muffins also remained moist the day after, which is also quite a rarity for muffins.

I'd usually reduce the amount of sugar used but I did not this time round. Since I used cranberries, the sugar balances the tanginess of the cranberries in the muffins.

So..Care for some cranberry muffins with a cup of hot cocoa on this cool, and wet Saturday afternoon...? :)

Now, i'm also coveting for a crown muffin pan...


Recipe's adapted from here


Saturday, January 8, 2011

Baked Macaroni with Bolognese Sauce and Mozzarella Cheese


A little mouthful, you think?
Literally it is and gastronomically, you'll have spoonfuls after spoonfuls for a mouthful of it all.

I had my first taste of a similar dish at Eighteen Chefs. I thought it tasted great, but the dish had a twist, it had bird's eye chilli (chilli padi). It was Spicy and Yummy! I thought I could try making it myself, so I had a go at it when a group of friends' came over place to our place many moons back, actually. It was a hit, especially since there's chilli padi in the sauce.

It was very easy to prepare too. For kids-friendly dish, just omit the chilli padi unless you have gregarious, adventurous 'chilli padis' yourselves! :)


Sautee garlic with diced red onions, some chopped coriander and dried oregano and when translucent, add the blended red onions.


Add in the minced meat and cooked till brown


Add in the bursts of colours! (diced tomato, broccoli, carrots, mushrooms an other greens) and cooked for a while


Add in the pasta sauce and cooked till sauce thickens


Grease casserole dish and pour in macaroni

Pour sauce over macaroni and top it with mozzarella cheese.
Bake in preheated oven at 180deg for 10-15mins


Yummy! and Easy! :)

These are the approximate measurements that I used since it was basically a throw-in everything kind of dish.

Ingredients:
2 garlic - to mince
1 big red onion - to dice
2 tbsp of blended red onion
5 to 6 bird's eye chilli - to cut into smaller pieces
8 cherry tomatoes - to dice
1 cup of minced beef
a few florets of broccoli
Chopped coriander
Dried oregano
1 large bottle of pasta sauce - i used Prego sauce all the time - 1/2 traditional and 1/2 fresh mushroom sauce.
Dash of black pepper
A pinch of salt and some sugar - to taste
Mozzarella cheese - to taste

1. Heat some oil in pan and sautee garlic, chilli padi (if you're using them), diced red onions, chopped coriander and dried oregano till onions become translucent. Then add blended red onions. Cooked till fragrant.
2. Add in the minced meat and cooked till brown. Add in diced tomatoes, broccoli, carrots, mushrooms.
3. Add in the pasta sauce and cooked till sauce thickens.
4.Grease your casserole dish with butter and pour the macaroni and pasta sauce into the dish.
5. Top with mozzarella cheese and baked in preheated oven at 180deg C for 10 to 15minutes.


The good thing about this recipe is that I can hide broccoli, carrots, and other vegetables in the sauce, as the boy is especially skittish about his greens.

I know I have to work harder to make him take to the greens voluntarily, but while I am *still* trying, this is one other avenue I have to resort to, hide them. :P

And yes, the boy had 3 rounds of the macaroni. :)

Win-win for boy and for mummy.

:)