Sunday, November 27, 2011

Kerisik (Toasted Coconut)

This year has been a year of a few firsts in my culinary adventures. It includes my first attempt at making kerisik. The result? It was successful. Yey!

Well, why did I make my own kerisik?
Because I wanted to make rendang for the very 1st time in my life, and 1 of the ingredients for rendang is kerisik. May I add that kerisik is an essential ingredient in rendang, very very important as without kerisik, what is rendang.

But why didn't I just get the ready-made kerisik from the stores?
Because I was so geared to be in front of the stove for ~6hrs, to toast the grated coconut to a lovely golden brown. Indeed, I was so gung-ho~. No regrets. And also, ready-made ones may not be as tasty and sometimes they do have a certain undesirable aroma after being packed for a while.

I can't quite remember now how much coconut I bought from the wet market but I think it'd have to be at least 1 whole coconut. We need to use the old coconut not the young coconut as young coconut is sweeter and less aromatic than the old one. The young coconut are the full-whites when grated and are used for malay kuih like kuih kasui, lopis and the likes.

In a wok, i used anodized wok, stir coconut repeatedly and frequently, with slow fire. Since it was my first attempt, I was very careful with the fire. I think it wasn't slow fire but *very* slow fire. :P
It should gradually changed colour from white to light brown and to a golden brown like these:

Fresh coconut at the beginning of it all. I also added a tablespoon of coriander seeds to the coconut.

changes to light brown, after approximately 3 hours

becomes more brown

finally to a golden brown, after close to 6 hours, with slow fire.

Then, using the miller, blend the golden brown coconut


Golden brown in miller and dark brown after milling on the right. The oil that was released from the milling changed it to dark brown.


Can be stored in airtight container and frozen. Just what I did.

And with the kerisik, I made my rendang for the very first time, for Eid this year:

Beef Rendang

The husband gave his thumbs-up for my very first rendang and that was enough for me.

The 6 hours of kerisik? It was all worth it.

:)


Sunday, November 13, 2011

Mee Goreng Basah


I have a few comfort food, comfort to my soul and comfort as it should be easy to whip up in the comfort of my kitchen with ingredients that are already in my fridge.

Mee goreng basah is one of them. I like it basah (wet) compared to the dry ones.


Ingredients:
500g of yellow noodles (usually 1 packet sold =500gm)
2 garlics crushed
3 shallots crushed
2 tbsps of blended chilli paste
6-7tbsps of chilli sauce ( approximate amount as I agak2 for mine;poured the sauce straight out of the bottle and into the wok)
6-7tbsps of tomato sauce ( approximate amount as I agak2 for mine;poured the sauce straight out of the bottle and into the wok)
1 tbsp of oyster sauce
1 tbsp of sweet soya sauce (kicap manis, I used kicap cap kipas udang)
sliced beef - beef has first been boiled in water till tender and the beef stock is used in the recipe too.
Slices of fish balls or fish cakes
Vegetables (chye sim/broccoli/bean sprouts, etc)
3/4 cup of beef stock


Optional:
If not using any beef stock, can add 1/2 chicken cube.

Fry crushed garlics and shallots till fragrant. Add the blended chilli paste and fry till fragrant. Add the slices of beef, sauces, beef stock and let it boil for a while. Add vegetables, noodles and mix everything thoroughly. Cook with low fire for 5-8mins thereabout. Add more water if you think it's a little dry.


Served with fried shallots, quartered fresh tomatoes and fried chicken, yum. :)


Nutella Mug Cake


I found out about mug cakes aka cakes baked in mugs a while ago. I was and am still intrigued by it. Don't you think it's so fun to be able to bake a cake in a mug? Definitely sounds fun to me! So it's a bit strange that I didn't try it earlier as it's super easy, very quick and I'll be able to get my endorphins fix in no time at all.

What do you know, I *finally* made it and the results is such a Hurray! I know i'm going to keep making it.

Cake mixture in the mug before baking:


Baked in microwave on high power for 1 and 1/2 mins:


Tadaaa! Oooey Gooeey Yummy, It's Ready!


So easy and so quick! Chocolatey and Rich!


The mug that I used was a little small, resulting in the 'chocolate explosion' above, but I still thought it looked appetizing with an artistic flair on the mug. Hahah! Bcos' baking is an art, isn't it? And so is cooking. :)

The husband who doesn't have quite a sweet tooth like I do, enjoyed it too. :)

Recipe's adapted from Family Kitchen

Ingredients:
4 tbsps all purpose flour
1/4 tsp baking powder
4 tbsps castor sugar
1 egg
1 tsp vanilla essence
3 tbsps cocoa powder
3 tbsps nutella
3 tbsps vegetable oil
3 tbsps chocolate milk
(it was more than 3 tbsps of milk for mine cos' I accidentally poured a lot more than 3)

Mix everything together in a large mug till smooth. Then bake in your microwave on high power for 1 and 1/2 minutes. The baking time depends on your microwave, you may need to increase it if needed. If yes, increase by 30secs duration.

Now, go and have ur endorphin-fix, the very nutella and chocolatey way.

The way I love it. :)

Wednesday, November 9, 2011

H's 4th in Colour


8th October 2007, a significant date; I was promoted to Motherhood. I am very grateful, extremely grateful and thankful for such a great blessing from HIM.

And so, H turns 4 on 8th October 2011...


Oreo Pops

For the boy's 4th birthday in October, he's my FAVOURITE Libran, I decided to make oreo pops as 1 of the goodies for his goody bags. It's actually very simple, time is the most essential ingredient and a bit of trial and error is needed for the size of the oreo balls.

First up, crush the cookies including its cream centre till they become fine. Do ensure there are no big chunks cos' we need to shape the 'dough' into balls and we don't want to bite into huge chunks.


I used my braun handheld blender to blend the cookies. I placed the cookies in a tall measuring jar and blend the cookies uncovered. Since there was no cover, I had a bit of 'flying cookie' incident. I thought the jar was tall enough but apparently not enough to prevent any flying cookie. Lesson's therefore learnt, covered food processors are the best tools for blending the cookies.


In a separate bowl, beat softened cream cheese with an electric mixer. Then, add the blended oreo cookies into the cream cheese:

Knead them together till they become 'dough-like':


Then, Shape them into balls. The balls can't be too big, not the size of ping pong balls definitely. Perhaps a little larger than the size of marbles. Any bigger, the ball may slide down the lolly sticks or it may also crumble under the weight of the melt and sprinkles. Need some trial and error and agak2 here.


You can either refrigerate for 2 hours first or freeze for 10 to 15 minutes. I am kiasu, so I did both; I refrigerate for 2 hours and then move up to the freezer for 10 minutes. We need them to firm up so they don't crumble. But you should still be able to insert lolly sticks into the ball.

Remove from freezer, melt some chocolate, dip the edge of the lolly sticks into the chocolate melt and insert halfway through the oreo ball, making sure the ball does not crack:


When all's done, I chose to refrigerate again for 15 minutes.

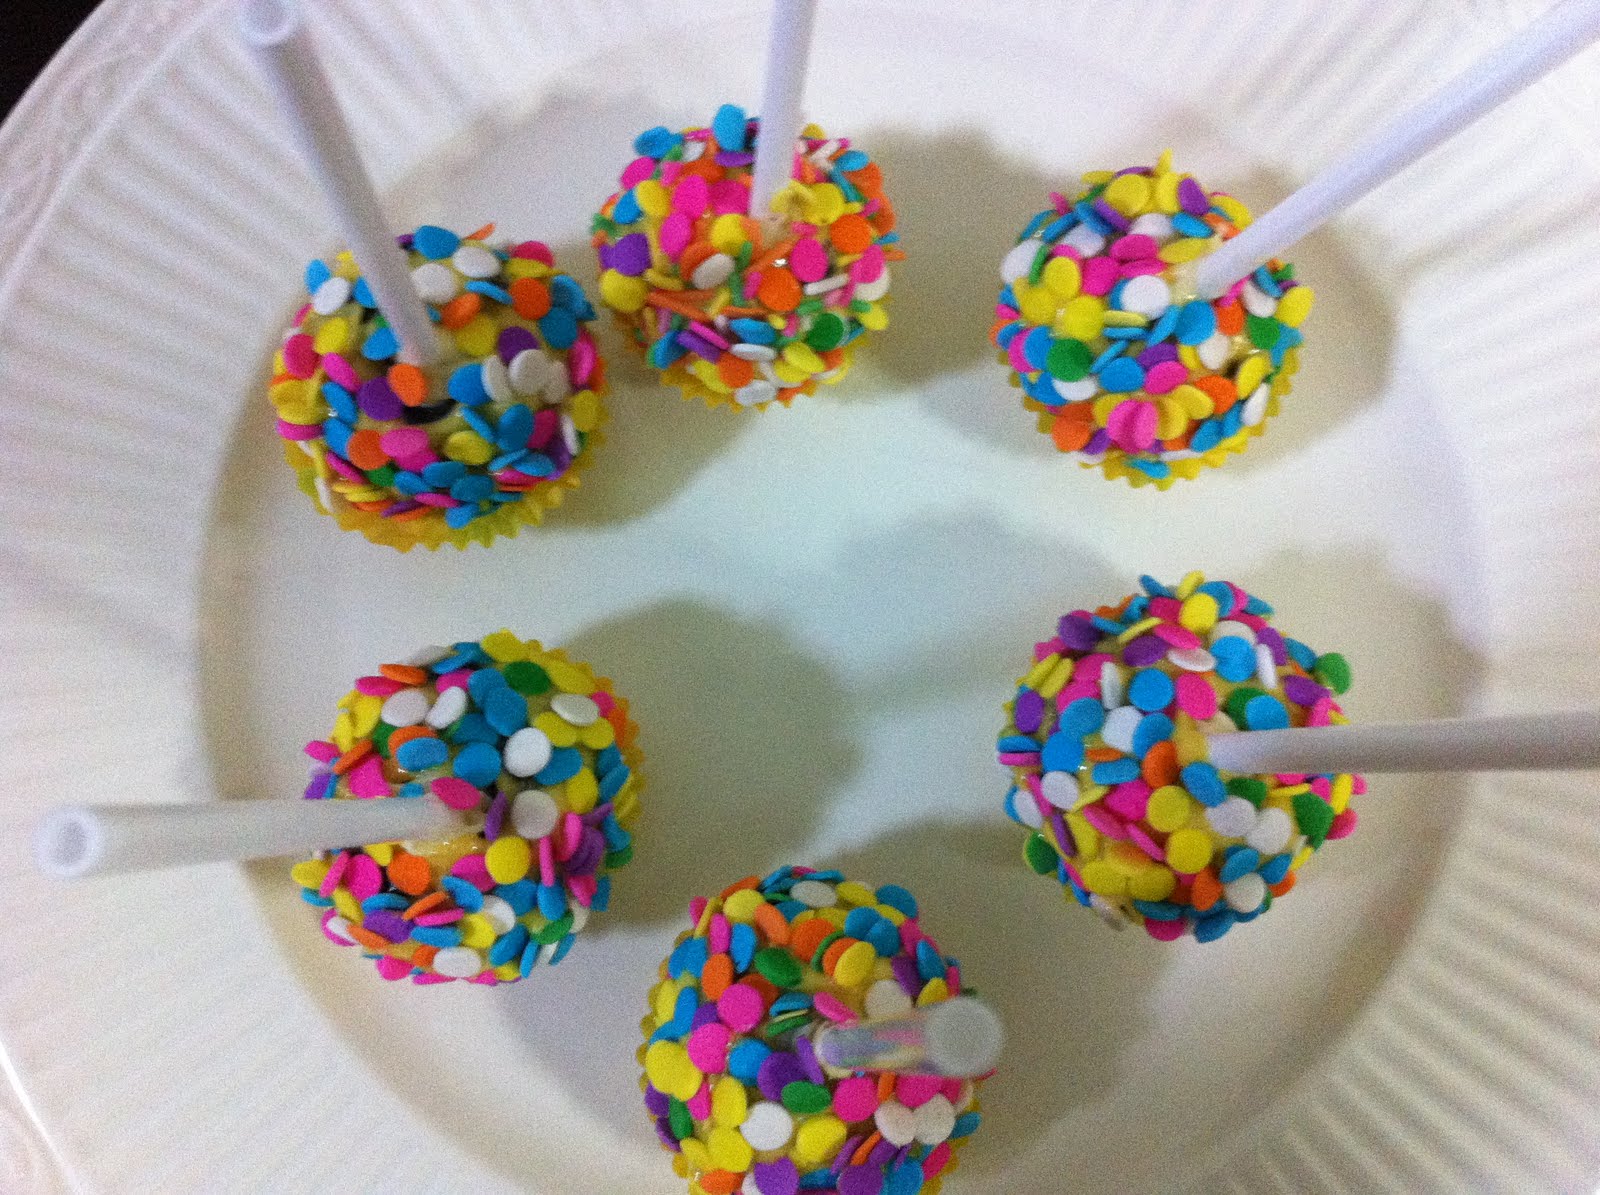
After that, melt some chocolate or candy melts and then start dipping the balls and sprinkle! This screams only one thing: FUN FUN FUN!!


Finally, all packed and good to go for the boy's goody bags!


For ~30 oreo pops, I needed:

3 packs of original oreos
226g of cream cheese
White chocolate, which I tinted with oil-based yellow colouring from wilton.
Lolly sticks
Sprinkles
All were bought from your trusty phoon huat. :)

Note: Chocolate needs to be melted the double-boiler way, making sure no water droplets get into the melt.

Other than the oreo pops, I also made chocolate muffins for the boy's goody bags, transformers-themed. But I guess that warrants another (picture) entry altogether.

Anyway, here's a peek:


Autobots, transform and roll out.

Was the boy happy? VERY VERY Happy with both his oreo pops and his transformers muffins.

What more can a mother ask?
:)))))))))))
actually a lot more but No.1 is always to:
BE HAPPY!

Monday, August 8, 2011

Chicken Nuggets and Chicken Strips

It's been almost 3 months now since my last update. Oh-oh. This definitely calls for one.

We had our longest holiday recently, and since it's the longest hol we've ever had, it took us even longer to get back to the routine at home. Ok, I digress. For our travels, we'd usually stay in apartments, kitchen included, for us to experiment with home-away-from-home food.

I don't know why but I made these a lot more when I'm overseas, compared to when I'm home. For our recent travel, I made them too, chicken nuggets and chicken strips. The original recipe's from the domestic goddess herself but I tweaked them a bit and they are still a hit.

It was super easy but make sure you marinate it for at least 48 hours, the minimum.

The chicken breast would need to be marinated with buttermilk and ritz or cheese crackers. I did just that, marinated with buttermilk, crushed some cheese crackers and kept it in the fridge for 2 days.

After 2 days, I minced 1/2 of the portion, shaped them into tiny nuggets, coat them with breadcrumbs and crushed cheese crackers and fry them.

The other half were cut in strips, again coated with breadcrumbs and crushed cheese crackers and fried. It was yummy!

The way I made it was a little more cumbersome since I minced the chicken meat (1/2 of the portion) as much as possible before I shaped them. I also marinated the chicken together with the cheese crackers. The original recipe didn’t call for both.

The good thing about the recipe is it’s great for kids and mummies can also hide tiny broccoli florets or julienned carrots into the nuggets, if your kids are a little skittish of their greens.

If you want the original recipe from none other than the domestic goddess, check it out here:

http://www.foodnetwork.com/recipes/nigella-lawson/ritzy-chicken-nuggets-recipe/index.html

Here’s a direct copy and paste from the above site:

Ingredients

* 2 (each weighing approximately 8 ounces with the peg bone, less without) chicken breasts
* 1 cup buttermilk
* 1/2 cup oil (if you are frying the nuggets)
* 1 3/4 cups cracker crumbs (recommended: Ritz crackers)
* Serving suggestion: Capery Salad, recipe follows

Directions

Cut off the chicken peg bone if there is 1, and put the chicken breasts one at a time into a freezer bag so that it lies flat. Bash with a rolling pin until the chicken is quite thin, and then take it out and slice into about 6 to 8 slices. Repeat with the other chicken breast. This is easiest done with scissors.

Put the slices into a freezer bag with the buttermilk and leave in the refrigerator to marinade for up to 2 days.

When you are ready to cook them, heat the oil in a large frying pan, or preheat the oven to 425 degrees F.

Tip the cracker crumbs into a wide shallow bowl, and then shake off the excess buttermilk from the nuggets and dip them in the crumbs. Coat them well before lying gently in the hot oil, and cooking for about 2 minutes or so a side until they are golden brown. Transfer to a kitchen towel on a plate to blot the excess oil.

Alternatively, you can lay the crumb-coated chicken nuggets on a lined baking sheet and bake for 15 to 20 minutes. They can also be frozen once marinated and crumbed. If cooking from frozen, add 5 minutes to the oven cooking time.


Tuesday, May 3, 2011

ikan bilis

I used to grind ikan bilis for my baby when he was a baby. age-wise, he’s passed his babyhood, but my baby he'll always be forever and ever. and ever. ok, enough said. :P

not too long ago, he started being picky with his food. with me. come weekends.

And so, i made the ground anchovies again, to sprinkle on his rice when he refused any other side dishes. he is happy with eating plain rice on its own, so sprinkles of anchovies would give him that much needed protein, calcium, omega-3′s and they are also low in mercury:

http://www.associatedcontent.com/article/1815432/the_health_benefits_of_anchovies.html

first, dry roast the anchovies


then grind it with your food processor
tadaa!

Stored in airtight container and kept in the fridge.